BGRABitmap tutorial 8
│ Deutsch (de) │ English (en) │ español (es) │ français (fr) │
Home | Tutorial 1 | Tutorial 2 | Tutorial 3 | Tutorial 4 | Tutorial 5 | Tutorial 6 | Tutorial 7 | Tutorial 8 | Tutorial 9 | Tutorial 10 | Tutorial 11 | Tutorial 12 | Tutorial 13 | Tutorial 14 | Tutorial 15 | Tutorial 16 | Edit
This tutorial shows how to use textures.
Create a new project
Create a new project and add a reference to BGRABitmap, the same way as in the first tutorial.
Using brush textures
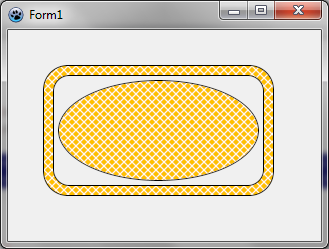
The simplest texture is a hatched brush.
With the object inspector, add an OnPaint handler and write:
procedure TForm1.FormPaint(Sender: TObject);
var
  image,tex: TBGRABitmap;
  c: TBGRAPixel;
  x,y,rx,ry: single;

begin
    image := TBGRABitmap.Create(ClientWidth,ClientHeight,ColorToBGRA(ColorToRGB(clBtnFace)));
    c := ColorToBGRA(ColorToRGB(clWindowText));

    //ellipse coordinates
    x := 150;
    y := 100;
    rx := 100;
    ry := 50;

    //loads a "diagcross" brush with white pattern and orange background
    tex := image.CreateBrushTexture(bsDiagCross,BGRAWhite,BGRA(255,192,0)) as TBGRABitmap;

    image.FillEllipseAntialias(x,y,rx-0.5,ry-0.5,tex);
    image.EllipseAntialias(x,y,rx,ry,c,1); //draw outline

    tex.Free;

    image.Draw(Canvas,0,0,True);
    image.free;
end;
As you can see, a texture is just some bitmap. To fill an ellipse with a texture, just pass the texture as a parameter instead of the color.
Two commands define the ellipse. The first is the filling, and the second is the outline. Notice that the radius is 0.5 pixel smaller for the filling. Indeed, when the pen width is 1, the inner radius is 0.5 smaller and the outer radius is 0.5 greater. Nevertheless, even if you pay attention to this, the result will not be perfect. If you want an antialiased junction between polygons, you need to use TBGRAMultishapeFiller in the BGRAPolygon unit and draw everything at once.
Using a command for the outline, we achieve to draw a textured ellipse with a border. But if the outline function is not available, you can also use another fill command with a greater radius with the border color first, and then a smaller radius for the inside.
Add the following lines before tex.Free:
    image.RoundRectAntialias(x-rx-10,y-ry-10,x+rx+10,y+ry+10,20,20,c,11);
    image.RoundRectAntialias(x-rx-10,y-ry-10,x+rx+10,y+ry+10,20,20,tex,9);
The first command draws a wide round rectangle (of width 11) that includes the border. The second command fill with the texture with a smaller width (9). This works perfectly as long as the texture is not transparent.
Run the program
You should obtain a round rectangle with an ellipse inside it. Each shape is filled with an orange texture.
Generating textures
Basic Perlin noise map
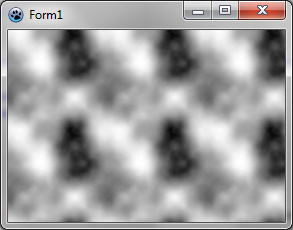
It is possible to generate tilable random textures using CreateCyclicPerlinNoiseMap that can be found in the BGRAGradients unit.
With the object inspector, define the OnPaint handler with:
uses
  BGRABitmap, BGRABitmapTypes, BGRAGradients;

procedure TForm1.FormPaint(Sender: TObject);
var
  image,tex: TBGRABitmap;

begin
    image := TBGRABitmap.Create(ClientWidth,ClientHeight);

    tex := CreateCyclicPerlinNoiseMap(100,100);
    image.FillRect(0,0,image.Width,image.Height, tex, dmSet);
    tex.free;

    image.Draw(Canvas,0,0,True);
    image.free;
end;
This creates a 100x100 texture, and fills the form with it. You should obtain something like this:
Changing color
This is very black and white. We can add some colors. For this, we will need some function to interpolate values. Here it is:
  function Interp256(value1,value2,position: integer): integer; inline;
  begin
       result := (value1*(256-position) + value2*position) shr 8;
  end;
This function computes a value going from value1 to value2. Position is a number between 0 and 256 which indicates how close the result is to the second value. The expression "shr 8" is an optimized equivalent to "div 256" for positive values. It is a binary shift of 8 digits.
We want to interpolate colors, so let's write a function to interpolate colors:
  function Interp256(color1,color2: TBGRAPixel; position: integer): TBGRAPixel; inline;
  begin
       result.red := Interp256(color1.red,color2.red, position);
       result.green := Interp256(color1.green,color2.green, position);
       result.blue := Interp256(color1.blue,color2.blue, position);
       result.alpha := Interp256(color1.alpha,color2.alpha, position);
  end;
It is straightforward : each color component is interpolated between color1 and color2 values.
Now we have everything to make some colors. After CreatePerlinNoiseMap, add the following lines:
    p := tex.Data;
    for i := 0 to tex.NbPixels-1 do
    begin
      p^ := Interp256( BGRA(0,128,0), BGRA(192,255,0), p^.red );
      inc(p);
    end;
You'll need variables 'p' and 'i', so click on each and press Ctrl-Shift-C.
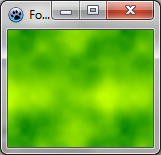
This loop takes each pixel and creates a color from dark green to light green-yellow.
We obtain a tree-like green color:
Using thresholds
Instead of varying continuously, the color can be changed with a threshold. For example, we can delimit sea and islands:
    p := tex.Data;
    for i := 0 to tex.NbPixels-1 do
    begin
      if p^.red > 196 then
        p^ := BGRA(192,160,96) else //island
        p^ := BGRA(0,128,196); //sea
      inc(p);
    end;
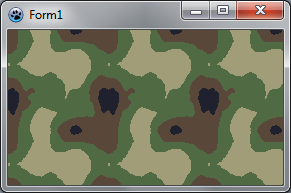
We can use more thresholds. Here is a camouflage:
    p := result.Data;
    for i := 0 to result.NbPixels-1 do
    begin
      v := p^.red;
      if v < 64 then p^:= BGRA(31,33,46) else
      if v < 128 then p^:= BGRA(89,71,57) else
      if v < 192 then p^:= BGRA(80,106,67) else
        p^:= BGRA(161,157,121);
      inc(p);
    end;
Sine function
We will apply here a sine function to noise values. Let's create a procedure for this:
  function CreateCustomTexture(tx,ty: integer): TBGRABitmap;
  var
    colorOscillation: integer;
    p: PBGRAPixel;
    i: Integer;
  begin
    result := CreateCyclicPerlinNoiseMap(tx,ty,1,1,1);
    p := result.Data;
    for i := 0 to result.NbPixels-1 do
    begin
      colorOscillation := round(((sin(p^.red*Pi/32)+1)/2)*256);
      p^ := Interp256(BGRA(181,157,105),BGRA(228,227,180),colorOscillation);
      inc(p);
    end;
  end;
The color oscillation is a value between 0 and 256. It is calculated out of the intensity (p^.red). Here we apply a sine function with a half-period of 32. This gives a number between -1 and 1. To put it in the range 0..1, we add 1 and divide by 2. Finally, we multiply by 256 to have an integer for Interp256.
The OnPaint procedure becomes simpler:
var
    image,tex: TBGRABitmap;

begin
    image := TBGRABitmap.Create(ClientWidth,ClientHeight,ColorToBGRA(ColorToRGB(clBtnFace)));

    tex := CreateCustomTexture(100,100);
    image.FillRoundRectAntialias(20,20,300,200,20,20,tex);
    image.RoundRectAntialias(20,20,300,200,20,20,BGRABlack,1);
    tex.free;

    image.Draw(Canvas,0,0,True);
    image.free;
end;
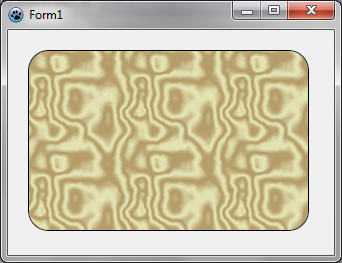
You should obtain something like this:
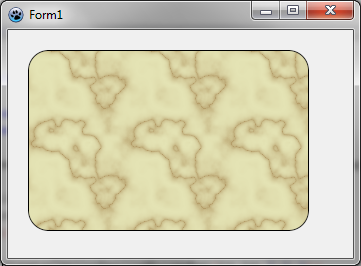
Now, if we want it to look like marble, we need less oscillations. For example, we can use a half-period of 80. On marble, the black parts are very thin. We can distort the oscillation by applying the power function : an exponent between 0 and 1 will make the values closer to 1 and an exponent greater than 1 will make the values closer to 0. Let's change the oscillation like this in CreateCustomTexture:
colorOscillation := round(power((sin(p^.red*Pi/80)+1)/2,0.2)*256);
Now we have something much more like marble:
Wood texture
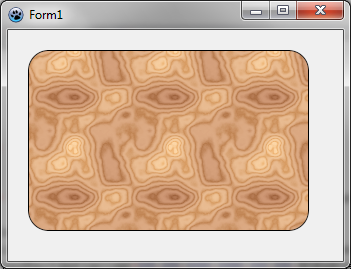
Wood texture can be achieved with sine functions too. Wood texture contains two oscillations, one with light colors, and another one with dark colors. So we need to apply a global variation between these oscillations:
  function CreateWoodTexture(tx,ty: integer): TBGRABitmap;
  var
    colorOscillation, globalColorVariation: integer;
    p: PBGRAPixel;
    i: Integer;
  begin
    result := CreateCyclicPerlinNoiseMap(tx,ty);
    p := result.Data;
    for i := 0 to result.NbPixels-1 do
    begin
      colorOscillation := round(sqrt((sin(p^.red*Pi/16)+1)/2)*256);
      globalColorVariation := p^.red;
      p^:= Interp256( Interp256(BGRA(247,188,120),BGRA(255,218,170),colorOscillation),
                      Interp256(BGRA(157,97,60),BGRA(202,145,112),colorOscillation), globalColorVariation);
      inc(p);
    end;
  end;
Here the half-period is 16, and the global variation is simply the intensity. The result is something like this:
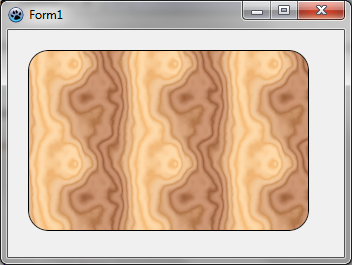
Most of the time, a wood texture is oriented along an axis. To do this, instead of using intensity only as a global position, we need to combine it with the x position:
  function CreateVerticalWoodTexture(tx,ty: integer): TBGRABitmap;
  var
    globalPos: single;
    colorOscillation, globalColorVariation: integer;
    p: PBGRAPixel;
    i: Integer;
    x: integer;
  begin
    result := CreateCyclicPerlinNoiseMap(tx,ty);
    p := result.Data;
    x := 0;
    for i := 0 to result.NbPixels-1 do
    begin
      globalPos := p^.red*Pi/32+x*2*Pi/tx*8;
      colorOscillation := round(sqrt((sin(globalPos)+1)/2)*256);
      globalColorVariation := round(sin(globalPos/8)*128+128);
      p^:= Interp256( Interp256(BGRA(247,188,120),BGRA(255,218,170),colorOscillation),
                      Interp256(BGRA(157,97,60),BGRA(202,145,112),colorOscillation), globalColorVariation);
      inc(p);
      inc(x);
      if x = tx then x := 0;
    end;
  end;
We obtain this:
Previous tutorial (splines) Next tutorial (phong shading and textures)
