fcl-image
Introduction
FCL-Image started life as "fpimage", pretty much as an attempt to implement a generally portable TImage like class, without the deep win32 and VCL ties.
Current file list
The central units are fpimage and fpcanvas and these are further enhanced by OOP derivation.
- bmpcomn A few structures and constants for the BMP fileformat
- clipping Some utility routines that help with clipping and intersecting of rects.
- ellipses Drawing of ellipses and arcs, and filling ellipses and pies.
- TEllipseInfo
- extinterpolation interpolation filters for TFPCanvas.StretchDraw (
- TBlackmanInterpolation
- TBlackmanSincInterpolation
- TBlackmanBesselInterpolation
- TGaussianInterpolation
- TBoxInterpolation
- THermiteInterpolation
- TLanczosInterpolation
- TQuadraticInterpolation
- TCubicInterpolation
- TCatromInterpolation
- TBilineairInterpolation
- THanningInterpolation
- THammingInterpolation
- fpcanvas Generic Canvas classes.
- TFPCanvasException
- TFPPenException
- TFPBrushException
- TFPFontException
- TFPCustomCanvas
- TFPCanvasHelper
- TFPCustomFont
- TFPCustomFontClass
- TFPCustomPen
- TFPCustomPenClass
- TFPCustomBrush
- TFPCustomBrushClass
- TFPCustomInterpolation
- TFPBaseInterpolation
- TMitchelInterpolation
- TFPCustomCanvas
- TFPCustomDrawFont
- TFPEmptyFont
- TFPCustomDrawPen
- TFPEmptyPen
- TFPCustomDrawBrush
- TFPEmptyBrush
- fpcolhash an implementation of a color hash table.
- TFPColorHashException
- TFPColorHashTable
- fpditherer contains classes used to dither images.
- FPDithererException
- TFPBaseDitherer
- TFPFloydSteinbergDitherer
- fpimage fpImage base definitions and classes
- TFPCustomImageReader
- TFPCustomImageWriter
- TFPCustomImage
- FPImageException
- TFPPalette
- TFPCustomImage
- TFPMemoryImage
- TFPCustomImageHandler
- TFPCustomImageReader
- TFPCustomImageWriter
- TIHData
- TImageHandlersManager
- fpimgcanv Image Canvas - canvas which draws on an image.
- TFPImageCanvas
- fpimgcmn Image Common: small procedural Helpers (swap,crc)
- fppixlcanv
- TPixelCanvas
- fpquantizer classes used to quantize images. See [1]
- freetype Encapsulating classes over freetype
- freetypeh Freetype header translation
- ftfont More freetype related font classes
- pcxcomn PCX fileformat records and types
- pixtools Pixel drawing routines.
- pngcomn PNG fileformat records and types
- polygonfilltools Routines for filling polygons (FPC 3.3.1 or newer)
- pscanvas TPostScriptCanvas implementation.
- targacmn Targa fileformat records and types
Readers and writers for various image formats reside in dedicated units:
- fpreadbmp, fpwritebmp: Reader and writer units for .bmp files
- fpreadjpeg, fpwritejpeg: Reader and writer units for .jpeg/.jpg files
- fpreadpcx, fprwritepcs: Reader and writer units for .pcx files
- fpreadpng, fpwritepng: Reader and writer units for .png files
- fpreadpnm, fpwritepnm: Reader and writer units for .pnm files
- fpreadtga, fpwritetga: Reader and writer units for .tga files
- fpreadtiff, fpwritetiff: Reader and writer units for .tiff/.tif files
- fpreadxpm, fpwritexpm: Reader and writer units for .xpm files
INC files uses in fpcanvas
- fpbrush
- fpcanvas
- fpcdrawh
- fpfont
- fphelper
- fpinterpolation
- fppen
INC files uses in fpmake
- fpcolors
- fpimage
- fphandler
- fpcolcnv
- fppalette
Demos
- drawing
- imgconv
Known Issues and limitations
- fcl-image is written for maximal portability and maintainability and is quite slow. The main storage type is 16-bit RGBA, storing always 64-bit per pixel, and a function is called to get each pixel.
- pngwriter doesn't implement automatic detection of filters, and thus is always "filter none"
- most writers don't autodetect what format to save. You must correctly set the relevant writer options ( see also bug 17621).
- the color format can be counter intuitive, read this thread
- png only implements basic chunk types (idat,trns,plte,ihdr and iend). It e.g. can't handle chunks like pHYs,iCCP,gAMA,cHRM yet. (bug 19209).
Image formats
Here is a table with the correct class to use for each image format, as well as comparing to the LCL.
| Format | fcl-image reader unit | fcl-image writer unit | LCL class |
|---|---|---|---|
| Windows Bitmap. A very simple format, usually used without compression and without transparency, but it may also have them, although many applications don't support those extra features. (*.bmp) | fpreadbmp | fpwritebmp | TBitmap |
| A popular format for websites. It supports up to 8 bits per pixels, which are 256 distinct colors chosen from the 24-bit RGB color space. This limitation makes it unsuitable for complex images, but useful for simple graphics. The image is compressed without loss in quality and the format also supports animations. (*.gif) | fpreadgif | - | TGIFImage |
| The most popular format for websites, and an ISO standard since 1994. The format compressed the image but generates a small loss of quality. (*.jpeg, *.jpg) | fpreadjpeg | fpwritejpeg | TJpegImage |
| A format widely used in DOS applications, but now less popular. (*.pcx) | fpreadpcx | fpwritepcx | - |
| Portable Network Graphics. A popular format for it's efficient compression without quality loss. (*.png) | fpreadpng | fpwritepng | TPortableNetworkGraphic |
| Supports the formats Portable BitMaps (*.pbm), Portable GrayMaps (*.pgm) and Portable PixMaps (*.ppm) | fpreadpnm | fpwritepnm | TPortableAnyMapGraphic |
| The default file format for Adobe Photoshop® (*.psd) | fpreadpsd | - | - |
| Called either Truevision TGA File Format or TARGA File Format, this is a compressed format commonly used in games. (*.tga, *.tpic) | fpreadtga | fpwritetga | - |
| Tagged Image File Format (TIFF), originally created to have a common image format for scanners. (*.tiff, *.tif). Controlled by Adobe® | fpreadtiff | fpwritetiff | TTiffImage |
| X PixMap, an image format used by the X Window System which stores the data in ASCII text. Is also used as an icon format in UNIX applications. (*.xpm) | fpreadxpm | fpwritexpm | TPixmap |
| X Window Dump file format. Used by the program xwd which generates screenshots in the X Window System. (*.xwd) | fpreadxwd | - | - |
| Windows Icon. Is a list of small bitmaps in various color depths and sizes, with transparency support and no compression. (*.ico) | - | - | TIcon |
| Windows Cursor. Exactly the same format as the Windows Icon, but with an extra field in the header for the cursor hotspot. (*.cur) | - | - | TCursorImage |
| macOS icon. List of small images in various sizes. (*.icns) | - | - | TIcnsIcon |
Tiff
Working features of the reader:
- Black and white/lineart/1 bit (FPC trunk only, not in FPC 2.6.x)
- Grayscale 8,16bit (optional alpha),
- RGB 8,16bit (optional alpha),
- Orientation, except for rotated orientation
- compression: packbits, LZW, deflate
- endian
- multiple images/multipage
- strips and tiles
- Sets properties in the image Extras properties, which is used by the writer, so that reading/writing keeps many common tags like Artist, Copyright, DateAndTime, HostComputer, ImageDescription, Maker, Model, Software, DocumentName, XResolution, YResolution, Orientation, bit depts, page name, isThumbnail.
Here is an incomplete list of open / not yet implemented features of the reader:
- Compression: jpeg, CCITT Group 3, CCITT Group 4
- PlanarConfiguration 2
- ColorMap
- separate mask
- fillorder - not needed by baseline tiff reader
- bigtiff 64bit offsets
- XMP tag 700
- ICC profile tag 34675
- Orientation with rotation
Working features of the writer:
- Grayscale 8,16bit (optional alpha)
- RGB 8,16bit (optional alpha)
- Orientation except rotated
- multiple images, pages
- thumbnail
- Compression: deflate
Here is an incomplete list of open / not yet implemented features of the writer:
- Compression: LZW, packbits, jpeg, CCIT Group 3,CCIT Group 4,...
- Planar
- ColorMap
- separate mask
- fillorder - not needed by baseline tiff reader
- bigtiff 64bit offsets
- endian - currently using system endianess
- Orientation with rotation
Walk-through
Basic Canvas Setup
You'll need a few things to start up. A canvas, image, and writer. The writer is to write images like PNG. The sample below will give you a 100x100 black png.
{$mode objfpc}{$h+}
program demo;

uses classes, sysutils,
     FPImage, FPCanvas, FPImgCanv,
     FPWritePNG;

var canvas : TFPCustomCanvas;
    image : TFPCustomImage;
    writer : TFPCustomImageWriter;
begin
  { Create an image 100x100 pixels}
  image := TFPMemoryImage.Create (100,100);

  { Attach the image to the canvas }
  Canvas := TFPImageCanvas.Create (image);

  { Create the writer }
  Writer := TFPWriterPNG.Create;

  { Save to file }
  image.SaveToFile ('DrawTest.png', writer);

  { Clean up! }
  Canvas.Free;
  image.Free;
  writer.Free;
end.
Drawing a Circle
Drawing a circle requires a bit more then just giving a width. You'll need to setup the pen style, mode, width, and color to do this. FCL-Image comes with a few pen modes and styles, it will really be up to you to decide which you'll need. Its best for now to try with a few modes and styles to get a better understanding of what FCL-Image can do.
{$mode objfpc}{$h+}
program demo;

uses classes, sysutils,
     FPImage, FPCanvas, FPImgCanv,
     FPWritePNG;

var canvas : TFPcustomCanvas;
    image : TFPCustomImage;
    writer : TFPCustomImageWriter;
    {
      Colors range from 0 to 65535 in each primary color.
      They can also show as hexadecimal:
      $FFFF = 65535, $0000 = 0
    }
    passionRed: TFPColor = (Red: 65535; Green: 0; Blue: 0; Alpha: 65535);
begin
  image := TFPMemoryImage.Create (100,100);
  Canvas := TFPImageCanvas.Create (image);
  Writer := TFPWriterPNG.Create;

  { Set the pen styles }
  with canvas do
  begin
    pen.mode    := pmCopy;
    pen.style   := psSolid;
    pen.width   := 1;
    pen.FPColor := passionRed;
  end;

  { Draw a circle }
  canvas.Ellipse (10,10, 90,90);

  { Save to file }
  image.SaveToFile ('DrawTest.png', writer);

  { Clean up! }
  Canvas.Free;
  image.Free;
  writer.Free;
end.
Drawing Alpha-Blended Shapes
Alpha-blending means: When something is painted over an existing image the old pixels are allowed to shine through the new drawing. The amount of mixing is given by the Alpha value of the new color which is specified as fourth word parameter of the brush's FPColor. Alpha=0 means: the new painting is fully transparent, Alpha=$FFFF means: the new drawing is fully opaque.
In order to activate alpha-blending the DrawingMode of the canvas must be switched to dmAlphaBlend, and the brush color of a new shape must be extended by its Alpha value.
program alphablend;
uses
  FPImage, FPImgCanv, FPCanvas, FPWritePNG;
var
  img: TFPMemoryImage;
  canvas: TFPImageCanvas;
begin
  img := TFPMemoryImage.Create(200, 200);
  canvas := TFPImageCanvas.Create(img);
  try
    canvas.DrawingMode := dmAlphaBlend;  // This activates the alpha-blend mode

    // Background
    canvas.Pen.Style := psClear;
    canvas.Brush.FPColor := colWhite;
    canvas.FillRect(0, 0, img.Width, img.Height);

    // Yellow opaque rectangle
    canvas.Brush.FPColor := FPColor($FFFF, $FFFF, 0);
    canvas.Rectangle(10, 10, 190, 100);

    // Overlapping semi-transparent red circle
    canvas.Brush.FPColor := FPColor($FFFF, 0, 0, $4000);
    canvas.Ellipse(60, 60, 140, 140);

    // Overlapping semi-transparent blue circle
    canvas.Brush.FPColor := FPColor(0, 0, $FFFF, $8000);
    canvas.Ellipse(0, 100, 100, 200);

    // Save to image file
    img.SaveToFile('alphablend.png');
  finally
    canvas.Free;
    img.Free;
  end;
end.
Brush Styles
The brush defines how a closed area will be filled. There are several predefined styles to determine the fill pattern.
- bsSolid - fills the area with uniform color
- bsClear - no fill
- bsHorizontal - draws horizontal lines of width 1 across the shape to be filled
- bsVertical - vertical lines
- bsFDiagonal - diagonal lines (45°, \\\)
- bsBDiagonal - diagonal lines (45°, ///)
- bsCross - crossed vertical and horizontal lines (+)
- bsDiagCross - crossed diagonal lines (x)
The fill color is given by the FPColor property of the Brush. The space between the lines of the non-solid patterns is not painted, i.e. is left transparent. If the canvas on which the brush is used descends from TFPPixelCanvas (e.g. TFPImageCanvas in unit fpimgcanv, or TLazCanvas in the LazUtils unit lazcanvas) the distance between the pattern lines can be adjusted by means of the Canvas.HashWidth property (Note that this does not apply to the TCanvas introduced by the Lazarus LCL.)
Furthermore there are two additional possibilities for user-defined patterns:
- bsImage - tiles the area to be filled with copies of the image provided by the Brush.Image which must be a TFPCustomImage descendant, e.g. TFPMemoryImage. The colors of the image are retained, and its alpha channel is supported. By default the image position refers to the image origin, but if the canvas descends from TFPPixelCanvas (e.g. TFPImageCanvas in unit fpimgcanv, or TLazCanvas in the LazUtils unit lazcanvas), it can be changed to be relative to the top/left shape bounding box by setting the property Canvas.RelativeBrushImage to true. Again this does not apply to the LCL TCanvas of Lazarus.
- bsPattern - provides a user-defined pattern in the Brush.Pattern property of type TBrushPattern. This is a 32-element array of 32-bit integers where every set bit is interpreted as a painted pixel using the Brush.FPColor; cleared bits are not painted and thus are transparent.
Example
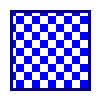
The following mini project fills a rectangle by a user-defined blue checkerboard pattern, and saves the image as a transparent png file:
program FillTest;
uses
  FPImage, FPCanvas, FPPixlCanv, FPImgCanv, FPWritePNG;
const
  BRUSH_PATTERN: TBrushPattern = (
    $FF00FF00, $FF00FF00, $FF00FF00, $FF00FF00,
    $FF00FF00, $FF00FF00, $FF00FF00, $FF00FF00,
    $00FF00FF, $00FF00FF, $00FF00FF, $00FF00FF,
    $00FF00FF, $00FF00FF, $00FF00FF, $00FF00FF,
    $FF00FF00, $FF00FF00, $FF00FF00, $FF00FF00,
    $FF00FF00, $FF00FF00, $FF00FF00, $FF00FF00,
    $00FF00FF, $00FF00FF, $00FF00FF, $00FF00FF,
    $00FF00FF, $00FF00FF, $00FF00FF, $00FF00FF
  );
var
  image: TFPMemoryImage;
  canvas: TFPImageCanvas;
  writer: TFPCustomImageWriter;
begin
  image := TFPMemoryImage.Create(100, 100);
  try
    canvas := TFPImageCanvas.Create(image);
    try
      // Prepare the brush for the shape interior
      canvas.Brush.Style := bsPattern;
      canvas.Brush.FPColor := colBlue;
      canvas.Brush.Pattern := BRUSH_PATTERN;

      // Prepare the pen for the shape border
      canvas.Pen.Style := psSolid;
      canvas.Pen.Width := 3;
      canvas.Pen.FPColor := colDkBlue;

      // Fill shape
      canvas.Rectangle(10, 10, 90, 90);

      // Save to file
      writer := TFPWriterPNG.Create;
      try
        // Activate alpha channel in saved image
        TFPWriterPNG(writer).UseAlpha := true;
        image.SaveToFile('rectangle.png', writer);
      finally
        writer.Free;
      end;

    finally
      canvas.Free;
    end;

  finally
    image.Free;
  end;
end.
Drawing a Gradient
Filling a rectangle by a horizontal or vertical gradient is rather easy - we just draw vertical or horizontal lines with varying colors:
uses
  FPImage, FPCanvas, FPImgCanv;

type
  TGradientDir = (gdHorizontal, gdVertical);

procedure GradientFill(Canvas: TFPCustomCanvas; ARect: TRect; AStartColor, AEndColor: TFPColor; ADirection: TGradientDir);

  function InterpolateColor(x, xmax: Integer): TFPColor;
  var
    factor1, factor2: Single;
  begin
    factor2 := x / xmax;
    factor1 := 1.0 - factor2;
    Result.Red := trunc(AStartColor.Red * factor1 + AEndColor.Red * factor2);
    Result.Green := trunc(AStartColor.Green * factor1 + AEndColor.Green * factor2);
    Result.Blue := trunc(AStartColor.Blue * factor1 + AEndColor.Blue * factor2);
    Result.Alpha := trunc(AStartColor.Alpha * factor1 + AEndColor.Alpha * factor2);
  end;

var
  x, y, max: Integer;
  color: TFPColor;
begin
  if ADirection = gdHorizontal then
  begin
    max := ARect.Right - ARect.Left;
    for x := ARect.Left to ARect.Right do
    begin
      color := InterpolateColor(x - ARect.Left, max);
      for y := ARect.Top to ARect.Bottom do
        Canvas.DrawPixel(x, y, color);
    end;
  end else
  begin
    max := ARect.Bottom - ARect.Top + 1;
    for y := ARect.Top to ARect.Bottom do
    begin
      color := InterpolateColor(y - ARect.Top, max);
      for x := ARect.Left to ARect.Right do
        Canvas.DrawPixel(x, y, color);
    end;
  end;
end;
Pen Modes
The pen mode is how the pixel drawn will react to the pixels beneath it. So if its a white pixel and you draw a red pixel over it with the mode of pmXor then you'll get a vibrate blue pixel.
- pmBlack
- pmWhite
- pmNop
- pmNot
- pmCopy
- pmNotCopy
- pmMergePenNot
- pmMaskPenNot
- pmMergeNotPen
- pmMaskNotPen
- pmMerge
- pmNotMerge
- pmMask
- pmNotMask
- pmXor
- pmNotXor
Pen Styles
- psSolid
- psDash
- psDot
- psDashDot
- psDashDotDot
- psinsideFrame
- psPattern
- psClear
Drawing modes
- dmOpaque -- painting over an existing image overwrites the pixels previously written.
- dmAlphaBlend -- painting over an existing image blends the old and new colors in the ratio of their Alpha value.
- dmCustom -- similar to dmAlphaBlend, but a function must be provided which defines how old and new colors are combined (TFPCanvasCombineColors = function(const color1, color2: TFPColor): TFPColor of object;).
The following code applies the dmAlphaBlend DrawingMode to draw two semi-transparent circles over an opaque rectangle:
program alphablend;
uses
  FPImage, FPImgCanv, FPCanvas, FPWritePNG;
var
  img: TFPMemoryImage;
  canvas: TFPImageCanvas;
begin
  img := TFPMemoryImage.Create(200, 200);
  canvas := TFPImageCanvas.Create(img);
  try
    canvas.DrawingMode := dmAlphaBlend;  // This activates the alpha-blend mode

    // Background
    canvas.Pen.Style := psClear;
    canvas.Brush.FPColor := colWhite;
    canvas.FillRect(0, 0, img.Width, img.Height);

    // Yellow opaque rectangle
    canvas.Brush.FPColor := FPColor($FFFF, $FFFF, 0);
    canvas.Rectangle(10, 10, 190, 100);

    // Overlapping semi-transparent red circle
    canvas.Brush.FPColor := FPColor($FFFF, 0, 0, $4000);
    canvas.Ellipse(60, 60, 140, 140);

    // Overlapping semi-transparent blue circle
    canvas.Brush.FPColor := FPColor(0, 0, $FFFF, $8000);
    canvas.Ellipse(0, 100, 100, 200);

    img.SaveToFile('alphablend.png');
  finally
    canvas.Free;
    img.Free;
  end;
end.
Drawing text
Here is an example, how to create a 200x100 image, painting a white background and some text and saving it as .png:
program fontdraw;

{$mode objfpc}{$H+}

uses
  Classes, SysUtils, FPimage, FPImgCanv, FTFont, FPWritePNG, FPCanvas;

procedure TestFPImgFont;
var
  Img: TFPMemoryImage;
  Writer: TFPWriterPNG;
  ms: TMemoryStream;
  ImgCanvas: TFPImageCanvas;
  AFont: TFreeTypeFont;
begin
  Img:=nil;
  ImgCanvas:=nil;
  Writer:=nil;
  ms:=nil;
  AFont:=nil;
  try
    // initialize free type font manager
    FTFont.InitEngine;
    FontMgr.SearchPath:='/usr/share/fonts/truetype/ttf-dejavu/';  // not needed on Windows
    AFont:=TFreeTypeFont.Create;

    // create an image of width 200, height 100
    Img:=TFPMemoryImage.Create(200,100);
    Img.UsePalette:=false;
    // create the canvas with the drawing operations
    ImgCanvas:=TFPImageCanvas.Create(Img);

    // paint white background
    ImgCanvas.Brush.FPColor:=colWhite;
    ImgCanvas.Brush.Style:=bsSolid;
    ImgCanvas.Rectangle(0,0,Img.Width-1,Img.Height-1);

    // paint text
    ImgCanvas.Font:=AFont;
    ImgCanvas.Font.Name:='DejaVuSans';
    ImgCanvas.Font.Size:=20;
    ImgCanvas.TextOut(10,30,'Test');

    // write image as png to memory stream
    Writer:=TFPWriterPNG.create;
    ms:=TMemoryStream.Create;
    writer.ImageWrite(ms,Img);
    // write memory stream to file
    ms.Position:=0;
    ms.SaveToFile('testfont.png');
  finally
    AFont.Free;
    ms.Free;
    Writer.Free;
    ImgCanvas.Free;
    Img.Free;
  end;
end;

begin
  TestFPImgFont;
end.
Reading an image file
It is very easy to read image files with fcl-image, as the example below shows:
uses
  fpreadgif, fpimage;

var
  image: TFPCustomImage;
  reader: TFPCustomImageReader;
begin
  Image := TFPMemoryImage.Create(10, 10);
  Reader := TFPReaderGIF.Create;
  Image.LoadFromFile(AFileName, Reader);
  // ...
Converting between two raster image formats
To convert simply open in one format and save in the desired one, like in this example:
uses
  fpreadgif, fpimage, fpwritebmp;

var
  image: TFPCustomImage;
  reader: TFPCustomImageReader;
  writer: TFPCustomImageWriter;
begin
  Image := TFPMemoryImage.Create(10, 10);
  Reader := TFPReaderGIF.Create;
  Writer := TFPWriterBMP.Create;

  Image.LoadFromFile(AFileName, Reader);
  Image.SaveToFile(ADestFileName, Writer);
  //...
Rescaling a bitmap image
In order to rescale a bitmap image to a new size we need an interpolation for calculating the intermediate new pixels. FCL-Image provides several interpolation classes; in all of them neighboring pixels are combined in some specific way to calculate the new pixel. The visual appearance of the result image depends on the type of the interpolation. Generally reducing the image size results in better image qualtity and magnification of the image size.
In order to access an interpolation class we need a instance of TFPCustomCanvas. A convenient one is TFPImageCanvas which closely cooperates with a TFPCustomImage.
program project1;
uses
  FPImage, FPCanvas, FPImgCanv, FPReadJPEG, FPWriteJPEG;
const
  FILE_NAME = 'cheetah.jpg';
  MAX_SIZE = 512;
var
  srcImg, destImg: TFPMemoryImage;
  canvas: TFPImageCanvas;
  scaleFactor: Double;
begin
  // Create and load the source image
  srcImg := TFPMemoryImage.Create(0, 0);
  srcImg.LoadFromFile(FILE_NAME);

  // Calculate the image scaling factor
  if srcImg.Width > srcImg.Height then
    scaleFactor := MAX_SIZE / srcImg.Width
  else
    scaleFactor := MAX_SIZE / srcImg.Height;

  // Create the destination image in the requested size
  destimg := TFPMemoryImage.Create(round(srcImg.Width*scaleFactor), round(srcImg.Height*scaleFactor));

  // Create a canvas for the destination image ...
  canvas := TFPImageCanvas.Create(destImg);

  // ... and an interpolation
  canvas.Interpolation := TFPBaseInterpolation.Create;

  // Use the interpolation to stretch the source image to the new size
  canvas.StretchDraw(0, 0, destImg.Width, destImg.Height, srcImg);

  // Save destination image to file
  destImg.SaveToFile('resized.jpg');

  // Clean up
  canvas.Interpolation.Free;
  canvas.Free;
  destImg.Free;
  srcImg.Free;
end.
Rotating a bitmap image by an arbitrary angle
Using the RotatePoint() and RotateRect() functions in the Lazarus unit GraphMath it is rather easy to rotate the pixels in a bitmap by an arbitrary angle. RotateRect() is needed to calculate the size of the rotated image, and RotatePoint is used to calculate back to the unrotated pixel for each point in the rotated image.
uses
  Types, Math, FPImage, GraphMath;

function CreateRotatedImage(AImage: TFPMemoryImage; Angle: Double): TFPMemoryImage; // Angle is in radians
var
  R: TRect;
  x, y: Integer;
  C, P: TPoint;
  delta: TPoint;
begin
  // Calculate bounds of the rotated image
  R := RotateRect(AImage.Width, AImage.Height, Angle);
  OffsetRect(R, -R.Left, -R.Top);

  // Calculate center of rotated image
  C := Point((R.Left + R.Right) div 2, (R.Top + R.Bottom) div 2);

  // Create the resulting image.
  Result := TFPMemoryImage.Create(R.Right - R.Left, R.Bottom - R.Top);

  // Correction needed to center the rotated pixels
  delta := Point((AImage.Width - Result.Width) div 2, (AImage.Height - Result.Height) div 2);

  // Iterate over all pixels in the result image and look up the corresponding
  // pixels in the unrotated image. Pixels in the rotated image which are outside
  // the unrotated image are set to be transparent.
  for y := 0 to Result.Height-1 do
    for x := 0 to Result.Width-1 do
    begin
      P := RotatePoint(Point(x, y) - C, -Angle) + C;
      P := P + delta;
      if (P.X >= 0) and (P.Y >= 0) and (P.X < AImage.Width) and (P.Y < AImage.Height) then
        Result.Colors[x, y] := AImage.Colors[P.X, P.Y]
      else
        Result.Colors[x, y] := colTransparent;
    end;
end;
Writing an 8-bit paletted bitmap file
The following section is based on forum discussion https://forum.lazarus.freepascal.org/index.php/topic,63215.msg478472.html#msg478472.
For creating a bmp file with a color palette set the UsePalette property of the TFPCustomImage to true. Add the FPColors of the palette entries to the image's Palette property. For painting on a canvas define colors by the FPColor values in the same way as with an unpaletted image; the palette index of the requested color is determined internally. When a color is not found in the existing palette, the color is added automatically. If this is not wanted you can also specify the colors by means of the palette index: canvas.Brush.FPColor := image.Palette[1]
program PaletteBMP;

{$mode objfpc}{$H+}

uses
  classes, fpcanvas, fpimage, fpimgcanv, fpwritebmp;

var
  img: TFPMemoryImage;
  cnv: TFPImageCanvas;
  writer: TFPCustomimageWriter;
begin
  img := TFPMemoryImage.Create(100, 100);
  try
    img.UsePalette := true;      // IMPORTANT!
    // colBlack is always available at index 0.
    img.Palette.Add(colYellow);  // Index 1
    img.Palette.Add(colBlue);    // Index 2
    img.Palette.Add(colGreen);   // Index 3

    cnv := TFPImageCanvas.Create(img);
    try
      cnv.Brush.FPColor := colYellow;
      cnv.Rectangle(10, 10, 45, 45);

      cnv.Brush.FPColor := colBlue;
      cnv.Rectangle(55, 10, 90, 45);

      cnv.Brush.FPColor := img.Palette[3];
      cnv.Rectangle(10, 55, 45, 90);

      cnv.Brush.FPColor := colWhite;  // not yet in palette
      cnv.Rectangle(55, 55, 90, 90);
    finally
      cnv.Free;
    end;

    writer := TFPWriterBMP.Create;
    TFPWriterBMP(writer).BitsPerPixel := 8;
    try
      img.SaveToFile('test-8bpp.bmp', writer);
    finally
      writer.Free;
    end;
  finally
    img.Free;
  end;
end.
Color reduction
When images are to be displayed on devices which support only a limited number of colors the number of distinct colors in the image must be reduced such that there is no significant loss in image quality. Two steps are involved in this process
- color quantization: This creates a palette with a maximum allowed size and adds those colors that are a good approximation of all colors in the original image.
- dithering: The palette colors are distributed over the image so that the original image is best approximated.
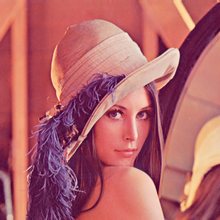
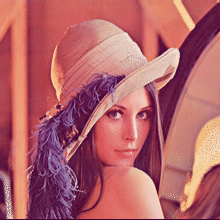
For this purpose, fcl-image contains the units fpquantizer and fpditherer. The following code is adapted from the forum post https://forum.lazarus.freepascal.org/index.php/topic,13468.msg70495. It reduces the input image to an image with the specified bits per pixels (4 bits per pixel --> 16 colors, 8 bits per pixel --> 256 colors):
uses
  fpimage, fpimgcanv, fpreadbmp, fpwritebmp, fpquantizer, fpditherer;

procedure ReduceColors(SourceFile, TargetFile:String; BitsPerPixel: Integer);
var
  sourceImg, targetImg: TFPMemoryImage;
  reader: TFPReaderBMP;
  writer: TFPWriterBMP;
  quantizer: TFPMedianCutQuantizer = nil;
  palette: TFPPalette = nil;
  ditherer: TFPFloydSteinbergDitherer = nil;
begin
  if FileExists(SourceFile) then begin
    sourceImg := TFPMemoryImage.Create(0,0);
    targetImg := TFPMemoryImage.Create(0,0);
    reader := TFPReaderBMP.Create;
    writer := TFPWriterBMP.Create;
    try
      sourceImg.LoadFromFile(SourceFile);
      quantizer  := TFPMedianCutQuantizer.Create;
      quantizer.ColorNumber := 1 shl BitsPerPixel;
      quantizer.Add(sourceImg);
      palette := quantizer.Quantize;
      ditherer := TFPFloydSteinbergDitherer.Create(palette);
      ditherer.Dither(sourceImg, targetImg);
      writer.BitsPerPixel := BitsPerPixel;
      targetImg.SaveToFile(TargetFile, writer);
    finally
      ditherer.Free;
      palette.Free;
      quantizer.Free;
      writer.Free;
      reader.Free;
      targetImg.Free;
      sourceImg.Free;
    end;
  end;
end;
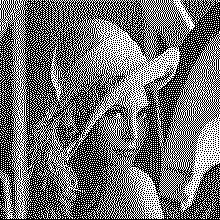
The same code can be used to reduce the colored input image to a dithered black-and-white image. Since here the palette consists of black and white only, the quantizer can be omitted:
uses
  SysUtils,
  fpimage, fpimgcanv, fpreadbmp, fpwritebmp, fpditherer;

procedure BlackAndWhite(SourceFile, TargetFile:String);
var
  sourceImg, targetImg: TFPMemoryImage;
  reader: TFPReaderBMP;
  writer: TFPWriterBMP;
  palette: TFPPalette = nil;
  ditherer: TFPFloydSteinbergDitherer = nil;
begin
  sourceImg := TFPMemoryImage.Create(0,0);
  targetImg := TFPMemoryImage.Create(0,0);
  reader := TFPReaderBMP.Create;
  writer := TFPWriterBMP.Create;
  try
    sourceImg.LoadFromFile(SourceFile);
    palette := TFPPalette.Create(2);
    palette.Add(colBlack);
    palette.Add(colWhite);
    ditherer := TFPFloydSteinbergDitherer.Create(palette);
    ditherer.Dither(sourceImg, targetImg);
    writer.BitsPerPixel := 1;
    targetImg.SaveToFile(TargetFile, writer);
  finally
    ditherer.Free;
    palette.Free;
    writer.Free;
    reader.Free;
    targetImg.Free;
    sourceImg.Free;
  end;
end;
Gamma correction
FCL-Image can be used for image transformations, such as gamma correction (adjustment of pixel values to modify brightness, see https://en.wikipedia.org/wiki/Gamma_correction):
uses
  fpimage, fpreadjpeg, fpwritejpeg, math;

procedure GammaCorrection(const ASrcFile, ADestFile: String; AGamma: Double);
var
  img: TFPMemoryImage;
  reader: TFPCustomImageReader;
  writer: TFPCustomImageWriter;
  i, j: Integer;
  clr: TFPColor;
begin
  Assert(AGamma <> 0.0);

  img := TFPMemoryImage.Create(0, 0);
  try
    reader := TFPReaderJpeg.Create;
    try
      img.LoadFromFile(ASrcFile, reader);
    finally
      reader.Free;
    end;

    for j := 0 to img.Height - 1 do
      for i := 0 to img.Width - 1 do
      begin
        clr := img.Colors[i, j];
        clr.Red := round(((clr.Red / 65535)**AGamma)*65535);
        clr.Green := round(((clr.Green / 65535)**AGamma)*65535);
        clr.Blue := round(((clr.Blue / 65535)**AGamma)*65535);
        img.Colors[i, j] := clr;
      end;

    writer := TFPWriterJpeg.Create;
    try
      img.SaveToFile(ADestFile, writer);
    finally
      writer.Free;
    end;
  finally
    img.Free;
  end;
end;
Bar codes
FCL-Image contains some units to create bar codes. Here is an example how to create a QRCode and save it as a graphics file:
program qrcode_as_imagefile;
uses
  fpqrcodegen, fpimgqrcode, fpWritePng;
const
  TEXT_STRING = 'This is a qrcode generated by fpc.';
  FILE_NAME = 'qrcode.png';
var
  qrcode: TImageQRCodeGenerator;
begin
  qrcode := TImageQRCodeGenerator.Create;
  try
    qrcode.PixelSize := 4;
    qrcode.Border := 8;
    qrcode.ErrorCorrectionLevel := EccHigh;
    qrcode.Generate(TEXT_STRING);
    qrcode.SaveToFile(FILE_NAME);
  finally
    qrcode.Free;
  end;
end.
And the next example creates a "2-of-5-industrial" barcode:
program code25_as_image_file;
uses
  Types, fpImage, fpBarCode, fpImgBarCode, fpWritePng;
const
  HEIGHT = 60;
  NUMERIC_TEXT = '0123456789';
  ENCODING = be2of5Industrial;
  UNIT_WIDTH = 2;
  WEIGHT = 4;
  FILE_NAME = 'barcode.png';
var
  barcode: TFPDrawBarcode;
  width: Integer;
begin
  barcode := TFPDrawBarcode.Create;
  try
    barcode.Encoding := ENCODING;
    barcode.UnitWidth := UNIT_WIDTH;
    barcode.Weight := WEIGHT;
    barcode.Text := NUMERIC_TEXT;
    width := barcode.CalcWidth;
    barcode.Rect := Rect(0, 0, width, HEIGHT);
    barcode.Image := TFPCompactImgGray8Bit.Create(barcode.Rect.Width, barcode.Rect.Height);
    try
      if barcode.Draw then
      begin
        barcode.Image.SaveToFile(FILE_NAME);
        WriteLn('Saved to file ', FILE_NAME);
      end else
        WriteLn('Error generating barcode.');
    finally
      barcode.Image.Free;
    end;
  finally
    barcode.Free;
  end;
end.
Getting image size without loading the image itself
Answer by forum member wp.
The basic image reader type, TFPCustomImageReader, is equipped with a class function ImageSize: TPoint which determines the image size in pixels without decoding the image data. In case of a jpeg image, the reader class is TFPReaderJPEG in unit fpreadjpeg; therefore, assuming that the image file is accessed via a stream, the image size can be obtained as a TPoint by a one-liner:
Size := TFPReaderJPEG.ImageSize(stream);
If you have other image file formats you must pick the correct reader class from the fcl-image units. To help you, the basic fcl-image class, TFPCustomImage, has class methods FindReaderFromStream(AStream) which determines the required reader class from the file header or FindReaderFromFileName(AFileName) which determines the reader class from the extension of the filename.
Putting these class methods together you can determine the image size for any image format supported by fcl-image by the following short function (do not forget to list the reader units in the uses clause for all file formats requested):
uses
  [...] fpImage, fpReadJpeg, fpReadBMP, fpReadPNG, fpReadGIF, fpReadPCX, fpReadTIFF, fpReadTGA;

function GetImageSize(const AFileName: String; out ASize: TPoint): Boolean;
var
  stream: TStream;
  readerClass: TFPCustomImageReaderClass;
begin
  Result := false;
  ASize := Point(-1, -1);
  stream := TFileStream.Create(AFileName, fmOpenRead);
  try
    readerClass := TFPCustomImage.FindReaderFromStream(stream);
    if readerClass <> nil then
    begin
      ASize := readerClass.ImageSize(stream);
      Result := true;
    end;
  finally
    stream.Free;
  end;
end;
See also
- Packages List
- Developing with Graphics
- Stretching a Canvas: Image support for Free Pascal: In this extensive article by Michael Van Canneyt, the Free Pascal support for images and simple drawing support is presented.
