Creating animated gifs for wiki
This page will explain how to create animated GIF's for wiki pages like New IDE features since.
Linux
If you don't mind running Windows application via WINE under Linux or FreeBSD, then I recommend you use the LICEcap v1.26 utility - it is so much quicker and easier. If you must use native apps, then follow the (much more effort) instructions below.
I use two free and open-source tools to create the animated GIF's.
- XVidCap v1.1.7 - captures the animation as single frames
- Gimp v2.6.6- Image editor to crop, optimize and save the frames as an animated GIF.
Step 1
Decide on what you want to capture. Remember that the width of wiki pages are limited, so fullscreen captures are not an option. It is recommended to only capture the area of interest. Once you know what you want to capture, rehearse the actions you want to capture.
Step 2
Open a terminal window and load XVidCap and set the capture mode to single frames - one image per frame. You do this by right clicking on the filename combo (left side of XVidCap) and select "Single Frame Capture" menu option. We load XVidCap form inside a terminal window simply so we can find the captured images easier. You can even create a specific directory for the animation.
By default XVidCap captures the animation at 10fps (frames per second) which is fine for what we want to accomplish.
Step 3
Use the "eye dropper" in the XVidCap main form and draw a rectangle covering the area you want to capture.
Step 4
Now click the red record button to start recording the animation. Now quickly switch to the window in which you rehearsed your actions. Once you finished your action sequence, switch back to XVidCap and click the stop button. You can now play back your unedited version of the animation. If it looks ok, then close XVidCap. You should now have a lot of *.xwd (X Window Dump) image files in the current directory.
Step 5
Now we will use GIMP to edit our animation. If you played back your animation in the previous step you would have notice that you have some uninteresting sections in your animation. Basically the beginning from that you pressed record and started your action sequence. The other uninteresting section is the end when your action sequence was complete and you clicked the stop recording button. We are now going to edit out those areas and only keep the interesting part.
Open the first .xwd image (starting position) of your animation sequence. This is probably not the first image and will probably be around image 10 or 20 in the sequence. GIMP shows a preview of the images as you highlight them in the File Open dialog. This will help you find a nice starting point. Once you found a nice starting point, select that image and click Open. GIMP will now load that single image and display it.
Step 6
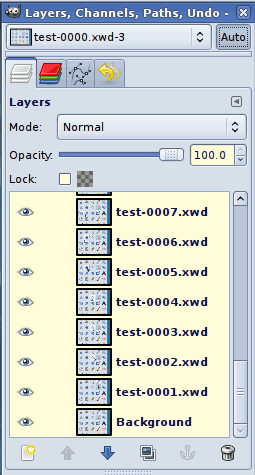
We now need to load the rest of the animation. For this we select "File > Open as layers" and multi-select all the images starting at the next image in sequence (after your starting image) and the last image in the sequence that you want. Again, the last image will be 20-40 images from the end. Once you selected all the images, click Open and GIMP will start loading those images as layers. This might take a while depending on the amount of images and how fast your computer is.
Step 7
Replay your animation sequence by selecting "Filters > Animation > Playback". If your sequence still contains a few unwanted areas in the beginning or end, then simply delete those layers in Gimp. The more experience you gain from making animated GIF's the better you will judge the starting and ending frames in steps 5 and 6 and the less tweaking is required.
Step 8
Now lets assume our animation sequence is exactly what we want. We could save the animation sequence at this point, but that would create a rather large animated GIF. Something in the range of 150KB file size and up. This is rather large for a wiki page containing a lot of animated GIF's. So we let GIMP do the hard work and optimize our animation by selecting "Filters > Animation > Optimize (Difference)". GIMP will now look at each layer starting at the beginning and reduce the size of each layer to only contain the difference between the current layer and the one before it. Once GIMP is done with its magic, it will automatically open up a new instance of your animation sequence containing the optimized version.
Step 9
The last step is simply to save our new animation sequence. Select the optimized version of our animation and select "File > Save As" and type in the name of your animation file with a .gif extension. For example: my_animation.gif
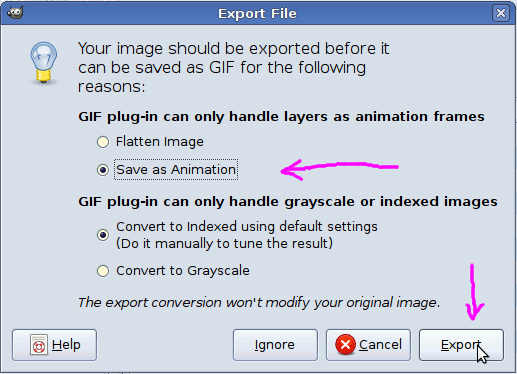
Once you click save, you will see the following dialog appear.
Select the "Save as animation" option and click "Export"
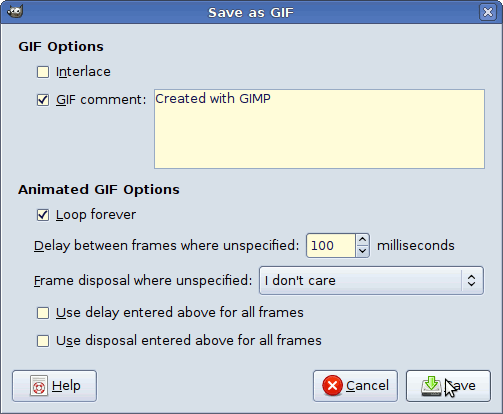
Another dialog will appear. Simply click "Save" and you are done! If you wanted to do a final test of your animated GIF file. Simple use your web browser (I use Mozilla Firefox) and open the animated GIF with your web browser and you should see the animation loop.
If you are happy, with your animation and the final file size is not to large (preferably under 50KB), then you are ready to upload the file to the Lazarus wiki.
Windows
An excellent and super easy animated GIF tool to use is LICEcap v1.26. It is a really small tool (a single 400KB executable) and works brilliantly. It works so well, I even use in via WINE under FreeBSD and Linux as my prefered Animated GIF tool.
You can also use CamStudio to capture video. Since it only saves avi, you need IrfanView or similar to get individual Images, which can then be used in Gimp. Further processing with Gimp will be similar to the Linux instructions (steps 5 through 9).
macOS
There is a macOS version of LICEcap too.


